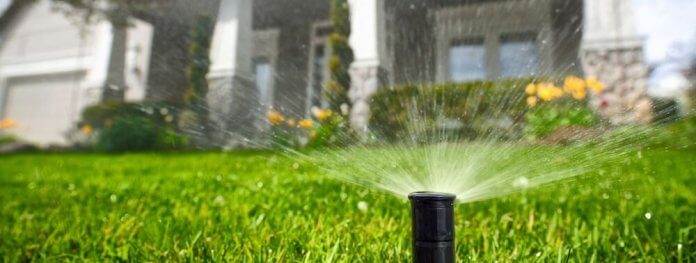

Are you looking to fix your own underground sprinkler system? A well-maintained underground sprinkler system will keep your lawn and garden lush and healthy.
However, underground sprinkler components can wear out or become damaged over time, leading to leaks, clogged heads, or malfunctioning irrigation valves.
In this comprehensive DIY Guide for Fixing Sprinkler Systems, we’ll walk you through common problems with your irrigation system, including replacing sprinkler heads, checking valves, repairing leaks, and more.
With the right tools and instruction in this Irrigation System (Repair Guide), you can keep your sprinkler system in top condition and ensure your landscape stays green and vibrant.
Tools Needed To Fix Irrigation System:
Before you begin any repair work on your sprinkler system, gather the necessary tools and materials. Here’s what you’ll need:
– Adjustable wrench
– Screwdriver (flathead and Phillips)
– Pipe wrench
– PVC pipe cutter or hacksaw
– Teflon tape
– Replacement sprinkler heads
– PVC pipe fittings
– PVC primer and cement
– Valve key or wrench
– Pipe repair clamp
– Wire stripper and electrical tape (for solenoid replacement)
NOTE: Actual Sprinkler System Parts are not included in the above list of materials.
If you find damaged parts of your sprinkler system, you can search for an online store or a local dealer based on your irrigation system “brand” (Toro, Ortho, Rainbird, Hunter, etc.).
Two Basic Types of Sprinkler Systems Heads:
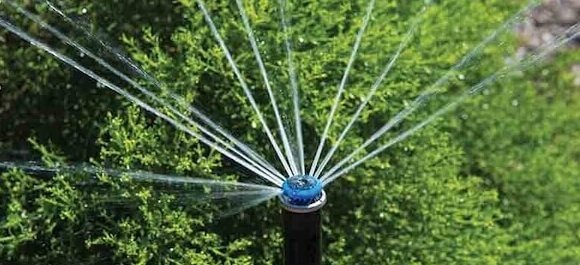
These are the Two Types of Home Sprinkler Heads that you will find in use for your Sprinkler System:
Type 1. Rotary Heads: These are the large sprinkler heads, which, as their name implies, “Rotate.” Depending on size, rotary heads can spray water over 25 feet away.

Type 2. Pop-Up Spray Heads: Again, according to their description, spray heads are used to spray areas along driveways, sidewalks, or garden beds, offering settings that can limit rotation to a straight line at 90 degrees.
Pop-up spray heads typically have a spray range of less than 10 feet.
Video: How to Operate & Adjust Each Type of Sprinkler Head
Top Seven (7) Sprinkler System Problems:
1. Fixing a Sprinkler Head (5 Steps)
- Turn off the Water: Locate the main shut-off valve for your sprinkler system and turn off the water supply.
- Remove the Old Sprinkler Head: Use an adjustable wrench to unscrew the old sprinkler head from the riser. Twist the head counterclockwise until it comes loose.

- Clean the Threads: Use a cloth or brush to remove debris or dirt from the riser threads.
- Install the New Sprinkler Head: Apply Teflon tape to the riser threads to create a watertight seal. Screw the new sprinkler head onto the riser clockwise until snug.
- Test the Sprinkler: Turn the water back on and test the new sprinkler head to ensure it functions correctly.
2. Cleaning and Resetting a Sprinkler Head (4 Steps)
- Remove the Sprinkler Head: Follow the steps above to unscrew the sprinkler head from the riser.
- Clean the Sprinkler Head: Use a toothbrush or a small wire brush to remove dirt, debris, and mineral deposits from the nozzle and the filter screen.
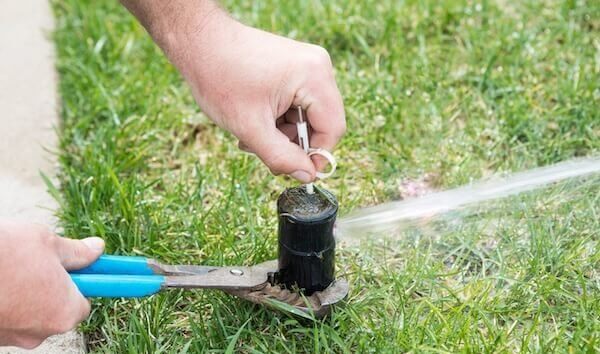
- Check for Clogs: Inspect the nozzle and filter screen for any obstructions that may be causing poor water distribution.
- Reassemble the Sprinkler Head: Once cleaned, reattach the sprinkler head to the riser and test it to ensure proper operation.
3. Sprinkler System Valve Repair (4 Steps)
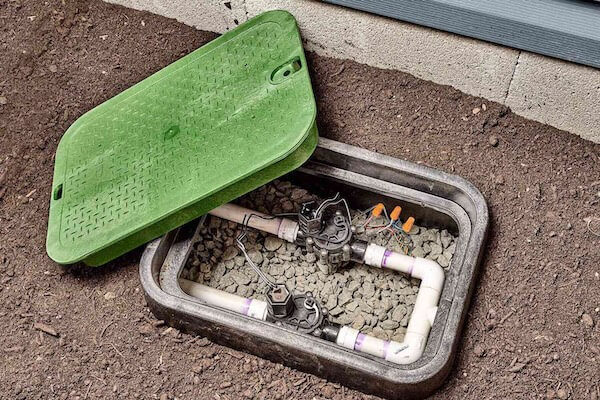
- Locate the Valves: Find the valve box for your sprinkler system, typically located near the main water supply line outside.
- Inspect the Valves: Open the valve box and check each valve for damage, corrosion, or leaks.
- Test the Valves: Turn on each valve manually using a valve key or wrench to ensure they open and close correctly.
- Repair or Replace Faulty Valves: If you encounter any valves not functioning correctly, repair or replace them as needed.
4. Finding and Repairing Leaks (3 Steps)
- Inspect the System: Walk the perimeter of your property and visually inspect the sprinkler lines for any signs of leaks, such as soggy or wet areas.
- Use a Leak Detection Tool: If you’re having trouble locating a leak, use a leak detection tool or rent a listening device to pinpoint the source underground. (Note: a professional irrigation installer may best handle this step.
- Repair the Leak: Once you’ve located the leak, carefully dig around the affected area and repair the damaged pipe using a pipe repair clamp or PVC fittings.
5. Repairing “Crushed Sprinkler Lines” (4 Steps)
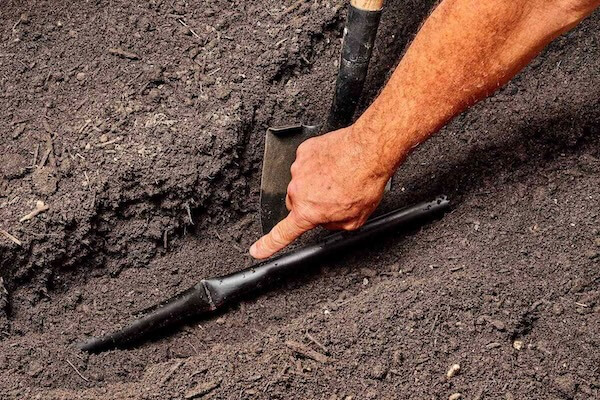
- Locate the Crushed Line: Use a metal detector or a probe to locate the underground section of the sprinkler line that has been crushed.
- Excavate the Area: Carefully dig around the crushed section of the pipe, exposing enough of the line to work comfortably on it.
- Cut Out the Damaged Section: Use a PVC pipe cutter or a hacksaw to cut out the damaged section of the pipe, ensuring clean, straight cuts.
- Replace with New Pipe: Install a new section of identical-diameter PVC pipe to replace the damaged portion, securing it with PVC primer and PVC cement.
- Replace the Soil and Sod, and sprinkle grass seed over the damaged lawn area.
6. Resetting the Sprinkler Control System (3 Steps)

- Locate the Control Panel: Find your sprinkler system’s control panel or timer located on the side of a house, in a garage, or in a utility room (see the above image of a typical sprinkler controller)
- Power Cycle the System: Turn off the control panel’s power and unplug it from the outlet. Please wait a few minutes, plug it back in, and power it on.
- Reset the Settings: Follow the manufacturer’s instructions to reset your control panel’s settings, including the date, time, and watering schedule.
7. Replacing the Sprinkler System Solenoid (5 Steps)

The Solenoids in a sprinkler system (two round green valves shown above) control the water flow to each zone. The example above shows two zones for this particular sprinkler system.
Solenoids receive a 24-volt signal from the sprinkler controller to the solenoid’s hot wire, as per its time/day settings, which engages the solenoid and opens the valve for that zone.
To test the functionality or replace a faulty Sprinkler Solenoid;
- Turn off the Water and Power: Shut off the water supply to your sprinkler system and turn off the power to the control panel.
- Locate the Solenoid: Find the solenoid valve for the zone you’re working on, typically in the valve box.
- Remove the Solenoid: Use a screwdriver to disconnect the wires from the solenoid and unscrew it from the valve body.
- Install the New Solenoid: Screw the new solenoid onto the valve body and reconnect the wires, ensuring they are securely attached.
- Test the System: Turn the water and power back on and test the zone to ensure the new solenoid functions correctly.
Before you get started, you may want to get familiar with how an irrigation system works – see the video below.
Anatomy of a Sprinkler System (Video)
Conclusion:
Repairing a sprinkler system with the right tools, materials, and knowledge needn’t be daunting.
By following these step-by-step instructions for Fixing Sprinkler Systems, you can keep your sprinkler system in top condition and ensure your lawn and garden receive the water they need to thrive.
Remember to prioritize safety when working with water and electricity, and don’t hesitate to seek professional assistance if needed.
Lastly, if you suspect significant repairs are required, such as the Master Valve or Backflow Preventer needing inspection or repair, call a professional.
Please leave us a Google Review. Your feedback helps us grow and lets other homeowners discover our site. Click Here to share your thoughts on Google!
Additional Reading & References:
- Proper Aeration of Turf Grass – PennStateUniversity.edu
- Improving Soil Conditions – MichiganStateUniversity.edu
- Check out why you should aerate your dry lawn here- Gardenersworld.com
- The Best Cordless Leaf Blower and String Trimmer Combo Kits – BestHomeGear.com