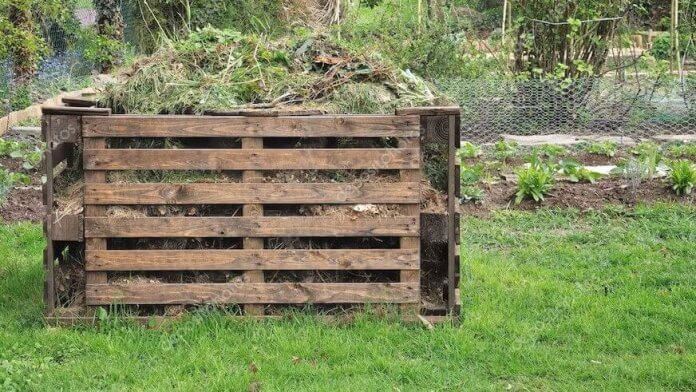

This guide will show you how to Build a (DIY) Compost Bin with Pallets. With a quick trip to a pallet supplier and hardware store, you can quickly build a very inexpensive compost bin in one day—or less!
If you have a vegetable garden, you already know that commercial fertilizers and soil additives can be costly.
A great way to avoid that extra expense is to build a homemade compost bin and turn organic matter from your yard and kitchen into nutritious food for your plants.
One of the quickest and easiest ways to build a DIY compost bin is to use cheap (or free!) wooden shipping pallets.
Today, we’ll show you everything you need to know about how to make an easy compost bin with pallets, and we’ll also help you learn a little about composting along the way :)
How to Build a Cheap Compost Bin (With Pallets):
The most straightforward design for building a composting bin uses pallets as a simple “three-sided” method.
The photo below shows three bins side by side; however, our instructions below instruct how to build a “single” 3-sided compost bin.

Gather the Materials:
- 3 – pallets (sized according to your needs – 4 pallets if you’re adding a door)
- 6 -“galvanized” metal corner brackets – with galvanized screws
- 1 – roll of 48″ chicken wire – Enough to wrap the entire compost bin inside.
- 3 – heavyweight galvanized strap hinges (optional door)
- 1- galvanized gate latch (Keeps the optional door closed)
- 1 – staple gun (to attach chicken wire to the bin)
- 1- a bale of Straw (optional)
Step 2 – Start Building
Attach the three pallets with galvanized (weather-resistant) metal corner brackets and screws to build the compost bin (photo above).
We suggest three brackets per corner because corner brackets offer much more stability than simply nailing or wiring the pallets together.
When you finish, you will have three boxes with open tops, bottoms, and fronts.
Step 3 – Add Chicken Wire
Now, take your roll of chicken wire and use the staple gun to attach it to the inside of wooden pallets.
In case you’re wondering, chicken wire helps keep the organic material from falling through the gaps between the pallet boards.
The wire still allows the compost to “breathe” and break down quickly. Folks who avoid this step often add it later!

Step 4 – Add Door to Compost Bin (Optional)
For more convenience and to keep the varmints out – we recommend modifying this pallet design by adding hinges and a cheap latch to one of the pallets, creating a handy – but beneficial compost door.
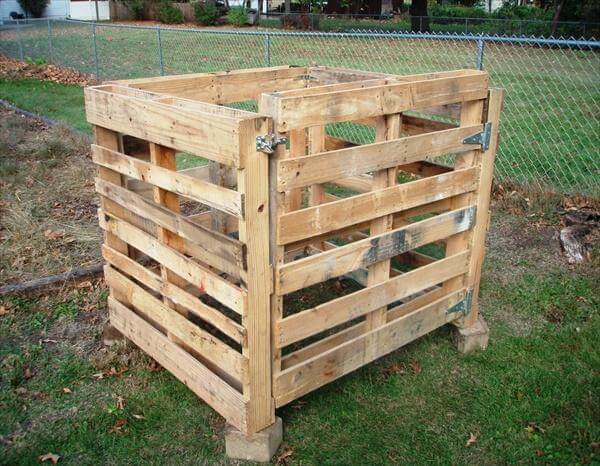
This extra step can be very worthwhile, as it will allow you to access your finished compost without digging it out of the bin from the top.
A door also makes the compost heap much easier to turn over as needed.
A Couple of Tips If you choose to add a Door:
Grab a friend and set the finished pallet bin on four bricks or pavers high enough for the door to swing freely. Attach the door to the compost bin and allow for door “clearances” before hanging it, at least 1” gap per side.
Step 5 – Add Front Ledge (Optional)
Assuming you’re not installing a door (Step 3), consider adding a front half-panel to prevent compost from spilling out. Add scrap 1″ x 6″ lumber across the bottom front of your compost bin opening to do so.
The panels can be set to any height you desire.
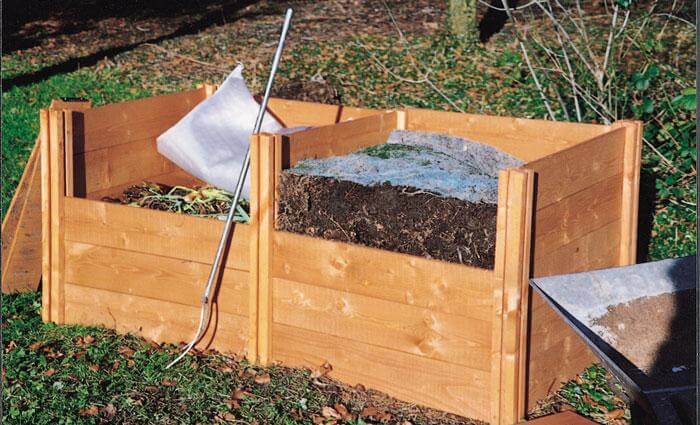
That’s it – You’re done!
Now it’s time to start your compost pile – New to composting – check out this article, Composting 101
(6) Six Other DIY Compost Bin Ideas:
Before you start this DIY project, check out some other compost bin ideas below. There are infinite compost bin ideas for making a home compost bin. Here are a few of our favorites:
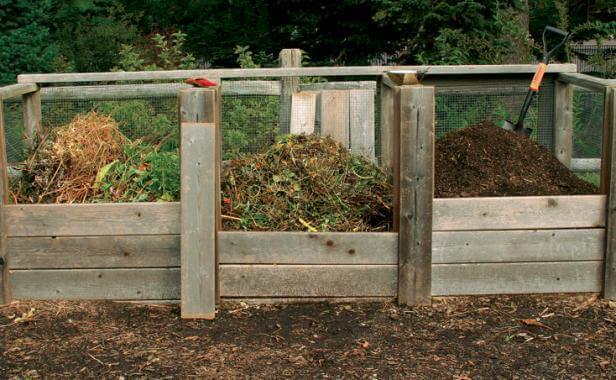
1) Multiple Compartment Compost Bins
- Some folks want to “stage” their compost pile into a New material, 50% composted, or ready-to-use pile. As they clean out the ready-material bin, they move the 50% ready compost material to the ready compost bin, the current new compost to the halfway bin, and so on.
This type of compost rotation allows you to have compost ready for your garden at any time and keeps an “open compost bin” available to start a new compost pile.
- Another method for using the three-compost bin design is to keep three separate compost piles going simultaneously and track each compost pile’s progress and turnover as needed.
- This way, you don’t have to move the compost from bin to bin.
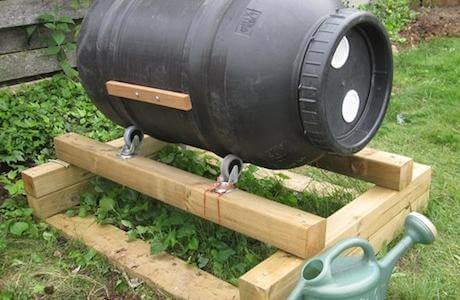
2) Compost “Tumblers.”
A Compost Tumbler is an easy DIY compost bin idea that uses lumberyard materials, four caster wheels, and a 50-gallon plastic drum.
3). Large Plastic Compost Containers:
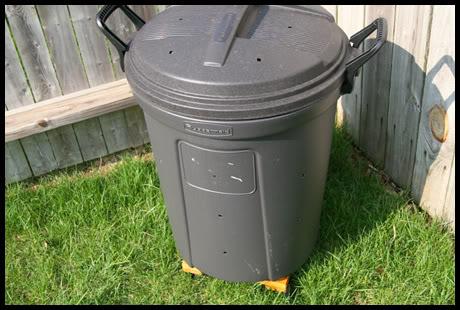
Plastic containers, such as old storage tubs or trash cans, can be easily converted into compost bins by drilling holes for good air circulation.
4). DIY Rotating Compost Barrel:
Likewise, an old metal drum can be turned into a helpful compost container with just a few simple modifications. This range of compost bin options begs the question: Why are wood pallets the best choice?
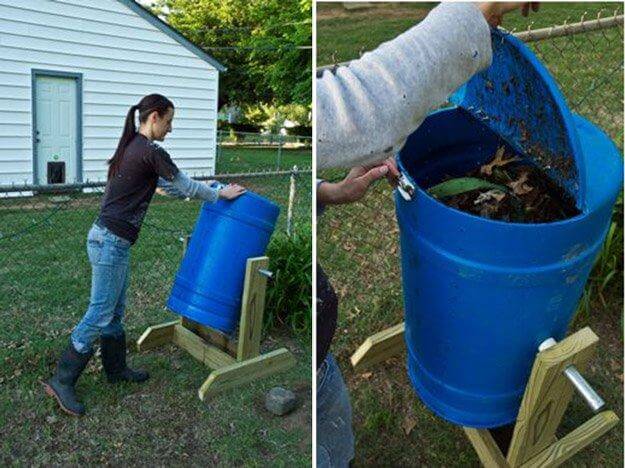
To assemble this easy and very effective Rotating Compost Bin :
Buy the materials – This idea calls for 1- 36” galvanized steel pipe, 2 PVC grommets (plumbing supply), 2 x 6 treated lumber, and a plastic compost bin with a lid – like this one.
Build the wood stand, drill holes in both sides of the barrel to allow for grommets and rod, and drill multiple 5/16” holes in the lid for aeration, insert PVC grommets in the barrel and steel pipe.
Now you have a fantastic DIY composter and an easy way to tip compost into a wheelbarrow!
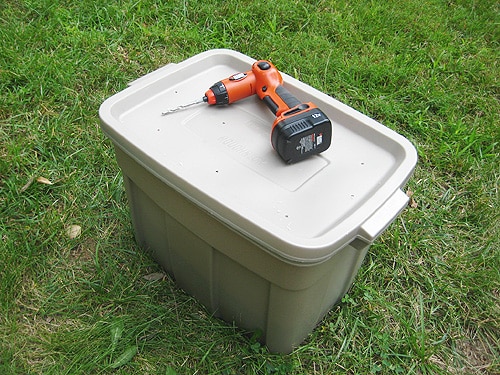
5) Make a $10 Patio Compost Bin:
Use a large Rubbermaid plastic bin. Drill 8-10 holes in the top and each side, and add compost.
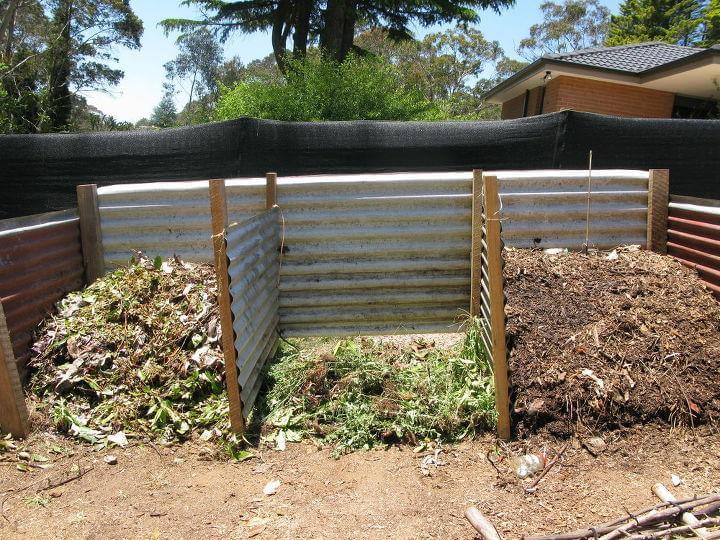
6). Corrugated Metal Compost Bin
One very sturdy and fantastic idea is to make a corrugated metal compost bin. This design below includes metal walls, an open front (no door), and three bins.
How Do You Start a Compost Pile?
Now that you know how to make compost bins, such as the ones described above, it’s time to put a little thought into getting your compost pile started.
Step 1 – Lay Down Straw Floor
Lay down a thick layer of straw on the floor of your compost bin.
This will keep the weeds and grass down and prevent finished compost from washing into the soil until the composting pile is well underway.
Step 2 – Pile On Organic Matter
Start placing organic material into the bin. Most experts recommend alternating layers of wet and dry materials for the best results.
For example, you might put a wet layer of fruit and vegetable refuse from your kitchen, followed by a dry layer of leaves or grass clippings.
You can also add a commercial compost starter to your pile to accelerate results and get it going. If you’re new to composting, check out this article below:
How To Make Compost – Composting 101 – From Morning Chores.Com
Step 3 – Keep Your Compost Pile Moist
Once you have your DIY compost bin built and your pile started, you’ll need to take a few extra steps to maintain it.
First, make sure the pile remains moist enough. While compost piles don’t need to be soaking wet, place your pile close enough to a garden hose and water source to maintain enough moisture so you can squeeze a drop or two by hand.
If the heap gets too dry, use a garden hose to moisten it. You’ll also need to turn the pile occasionally to mix the materials.
Step 4 – Don’t Forget To Flip The Compost!
While some composters swear by turning their compost frequently, most experts agree that you only need to turn the pile once or twice during the 60-day composting process. For this, you can use either a shovel or a sturdy pitchfork.
Frequently Asked Questions (FAQ) Pallet Gardens
Q: Is Using Wood Pallets for Compost Bins a Good Idea?
A: Building a wooden pallet compost bin offers an easy and affordable way to build a bed. Pallets offer the greatest durability, capacity, and savings in material costs for compost bins.
Q: How Long Do Wood compost bins Last?
A: DIY compost bins are built from sturdy shipping pallets and can sit outside for many years without issues. However, as we’ll discuss later, some are treated chemically to prevent rot, which can harm compost.
Q: How Big Are Wood Pallets?
A: According to the GMA (Grocery Manufacturers of America), the Industry standard for wood pallets is 48″ long x 40″ wide.
Q: How “Big” Should You Make A Compost Bin?
A: The size of a wood pallet compost bin is unlimited. We recommend calculating the amount of compost you will use annually and building your compost bin (or bins) accordingly.
Perhaps you could start with three pallets and build a 48″ x 48″ x 48″ compost bin.
Q: How Many Compost Bins Do I Need?
A: If you want to get serious and “stage your compost piles,” you will need three compost Bins. The first bin holds New material, the second holds halfway composted material, and the third holds compost ready for your gardens.
As you empty the Ready for a Garden material bin, move the halfway-ready compost material to the Ready compost bin and the New compost to the halfway bin.
This rotation keeps compost ready and keeps an open compost bin to start a new compost pile.
Q: How Much Does A Pallet Compost Bin Cost?
A: A Pallet Compost Bin can be built for under $10 since pallets can often be found for free at local Grocery stores and Factories.
In this case, you can build your DIY composter for nothing more than the price of some “chicken wire and cheap hardware.”
Q: Should I Put a Lid On A Pallet Garden Bin?
A: Lids are an excellent way to keep varmints out or prevent snowfall from filling your compost bin in the winter.
You can easily add a lid to your compost bin by building a frame from treated 1 x 3 or 2 x 4 pine. The Lid can then be covered with a plastic tarp or other waterproof material to keep heavy snowfall, critters, (or kids) out.
Lastly, add a pair of hinges to flip it out of the way when accessing the compost.

Remember, a compost pile needs water and air to break down organic material – so in most conditions, we recommend either leaving the lid up most of the time or not including a lid at all – leaving the top of the bin open altogether.
Looking for Some Backyard Privacy? Check out our Recent Post: Cheapest Way to Build a Privacy Fence
Q: Where Do I Find Free Wood Pallets?
A: Here are three ideas about where you can get pallets for free:
1. Look first on your local Craigslist page, as people often use pallets for free to eliminate them.
2. If you don’t find any free pallets in your local classifieds, consider contacting local businesses, like grocery stores or manufacturers, to see if they can supply you with a few pallets they no longer need.
3. In a worst-case scenario, you may need to spend $2-3 to pick up a pallet or two from a local supplier, but even at this price, the material is pretty cheap compared to buying new lumber.
Important: An essential thing to look out for when picking up wood pallets Is a stamp labeled “MB” on the pallet.
The MB designation indicates that the wood pallet has been treated with a toxic chemical. You shouldn’t use or put this chemical in your garden or anywhere near your food sources. Read More about using safe pallets here.
Check out this YouTube video – What to look for when selecting pallets:
Conclusion
Now you know how to make a compost bin with pallets, start a compost pile, and make garden compost.
Armed with this knowledge, you’re well on your way to making your own cheap and abundant garden fertilizer and achieving the best flower and vegetable garden you’ve ever seen!
Please leave us a Google Review. Your feedback helps us grow and lets other homeowners discover our site. Click Here to share your thoughts on Google!
Additional Reading and References:
- Best “Child-Friendly” Garden Ideas – Besthomegear.com
- 5 Reasons your lawnmower may not be starting – City-data.com
- What’s The Best Portable Generator for an RV? – Besthomegear.com
- How do you clean and change your spark plug? – Briggsandstratton.com
- Top 5 Best Battery-Powered Leaf Blowers – Besthomegear.com